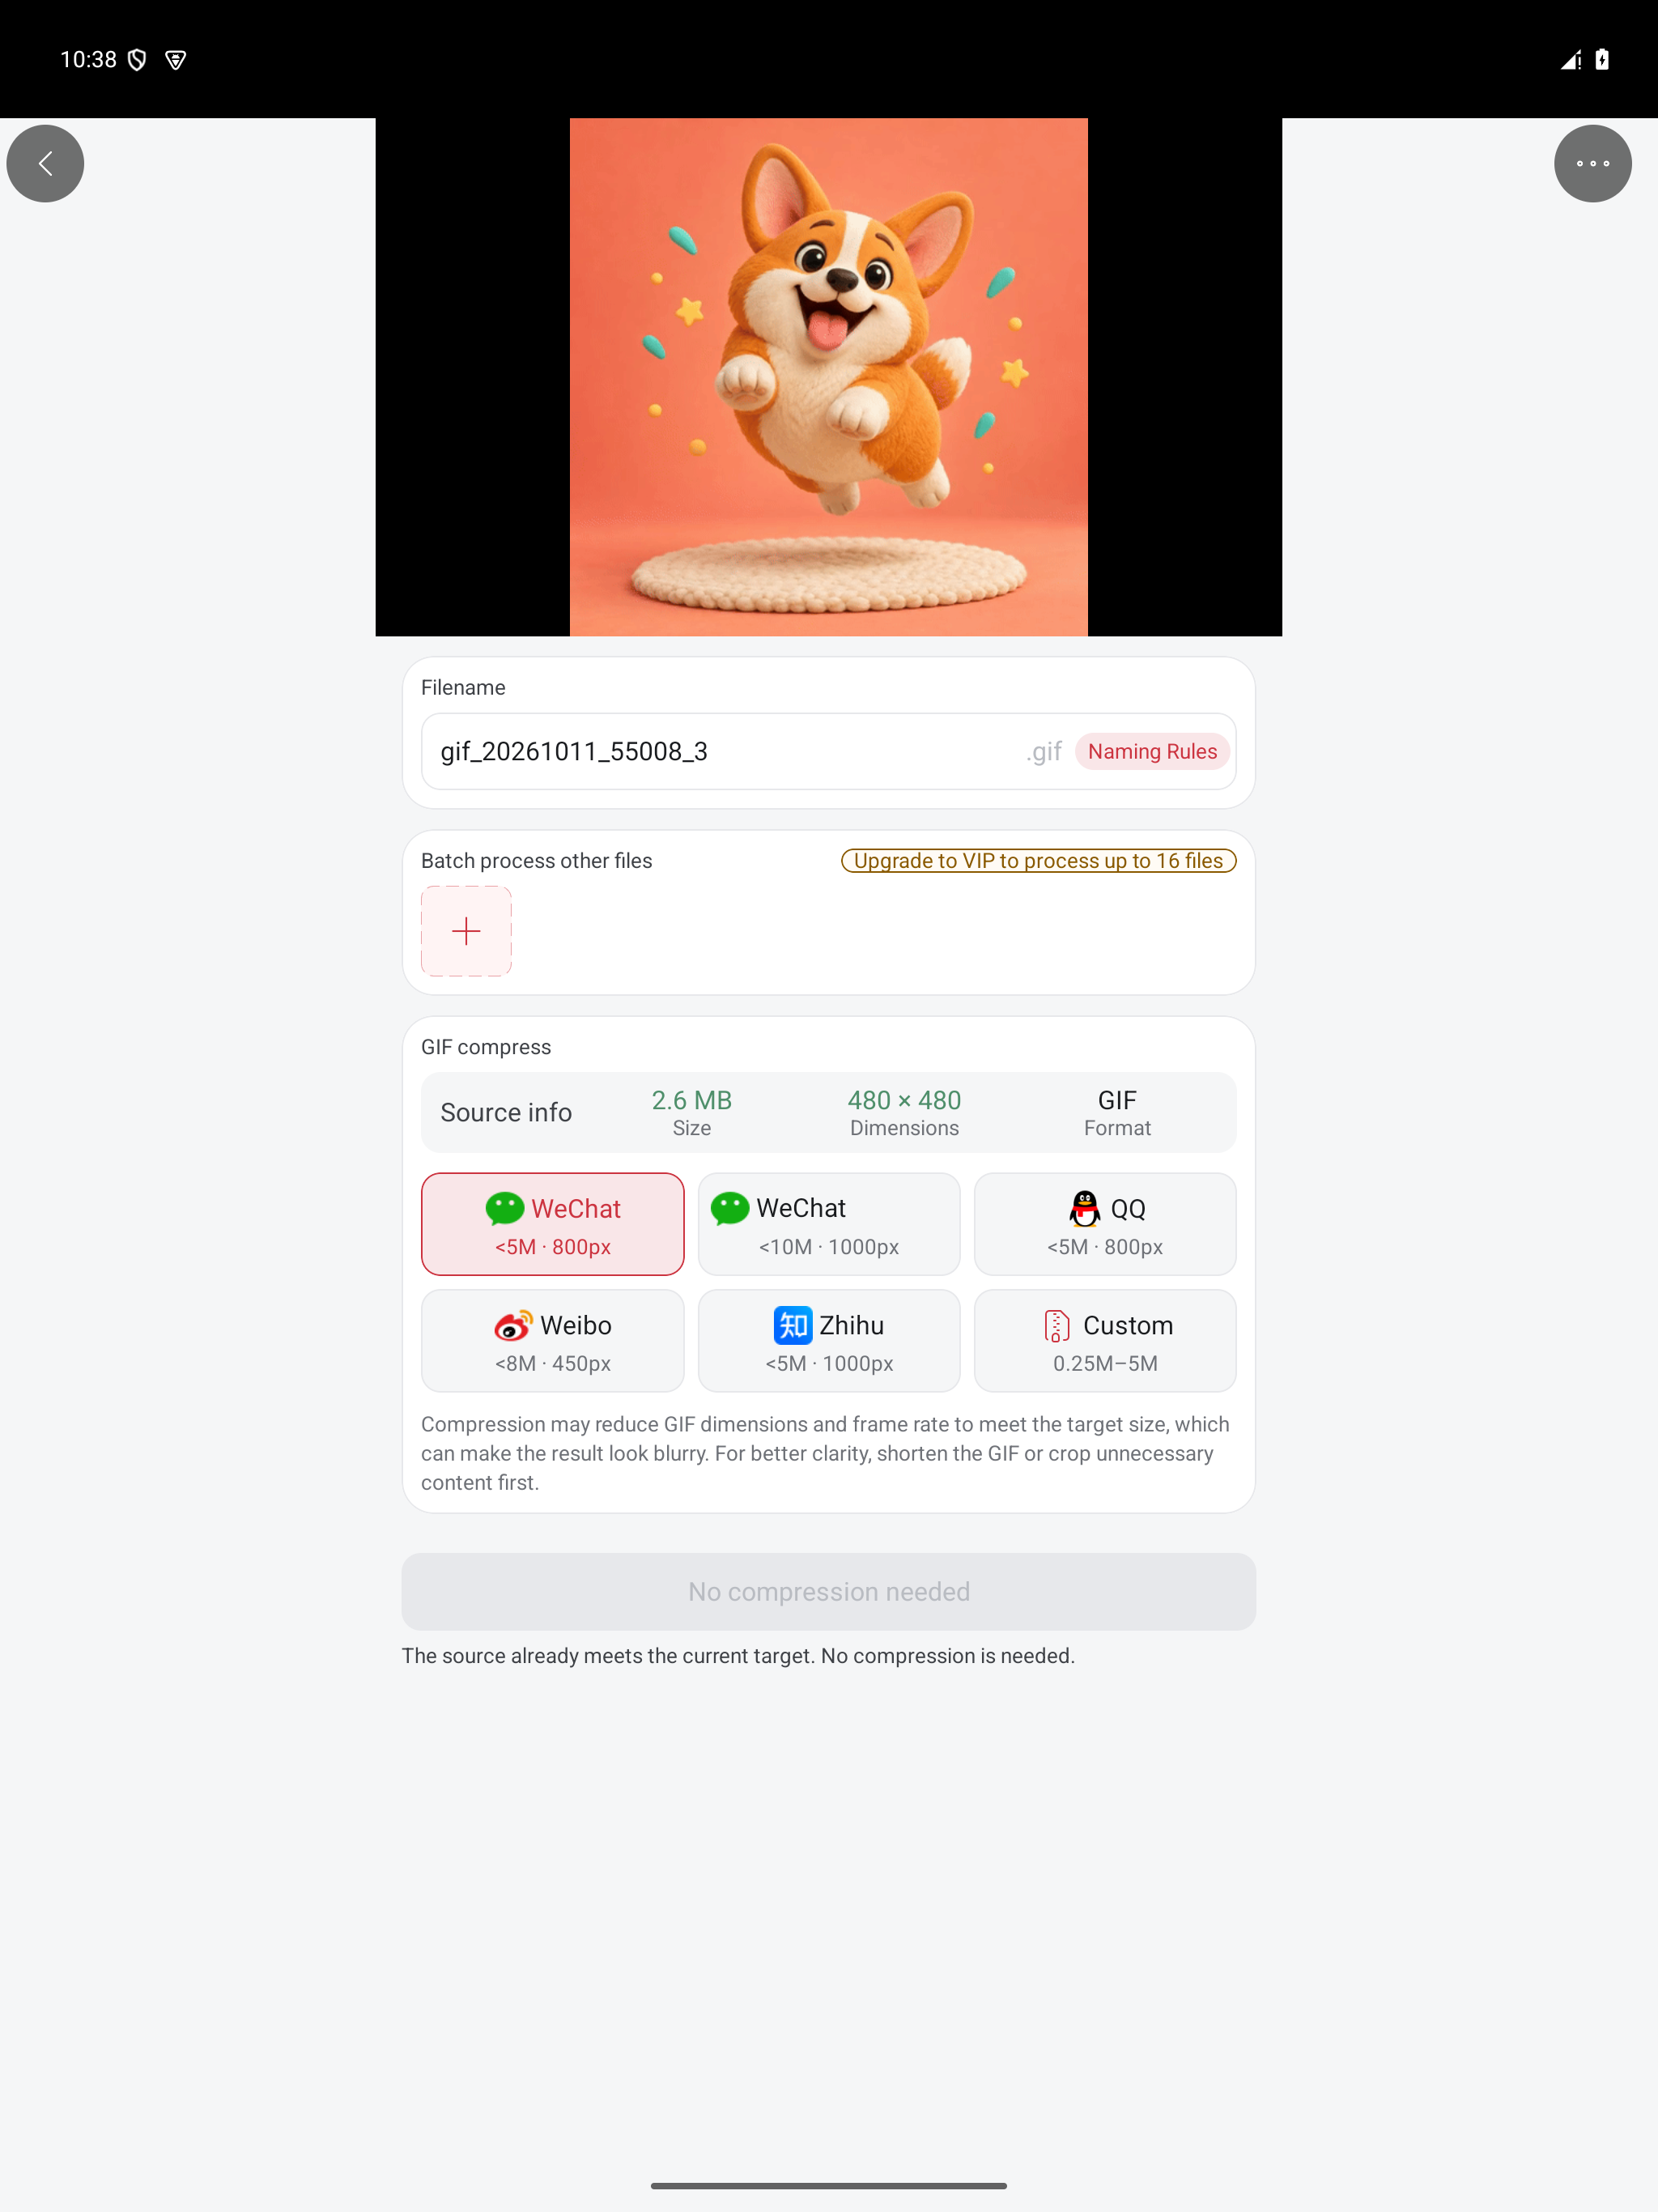
Read the source and target before exporting
Open GIF compress with a local GIF and read Source info. In the real Android screen below, the input is shown as 2.6 MB at 480 × 480. The selected preset already accepts this input, so the app says No compression needed. Keep the original in this case. For a stricter destination, choose Custom and set the required target; check the app’s current export controls, then compare the saved GIF against the original. Presets are app settings, not a promise about another service’s current upload limits.
Set a size limit and decide what must remain readable
Record the original file size, dimensions, and duration, then check the upload limit currently shown by the destination. Identify the text, action, and frames the GIF needs to communicate before reducing anything.
Can I compress a GIF to 200KB or 1MB?
Treat 200KB or 1MB as example targets, not fixed limits for any sharing platform. In Smart compress, adjust options and check the actual size after export. There is no promise that entering a target will make every source fit. If the result remains too large, shorten the source with Cut and split and compress it again. Some targets require losing detail or shortening the animation.
File size in KB or MB versus dimensions in pixels
KB and MB measure storage size; 480 by 480 pixels describes frame width and height. GIFs with identical dimensions can have different file sizes because duration, frame count, and motion differ. Check the exported file size for a byte limit and use the GIF resizer for a width or height limit. Verify both when the destination has both requirements.
Crop and shorten before reducing dimensions
Remove empty margins, unrelated areas, and repeated footage. If the result is still too large, reduce its dimensions gradually. Small captions, thin lines, and interface recordings need an exported comparison to confirm that they remain readable.
GIF too large to send: check what the limit measures
Start from the original and record its byte size and the limit shown by the destination. First remove unused edges and record the exported size. If it remains too large, return to the original, shorten the clip, and then try smaller dimensions. Check captions and key motion each time. Calculate any reduction from actual files instead of treating a preset percentage as a measured result.
Change one setting at a time and keep the original
Export a candidate and record the dimensions or quality setting you changed together with the resulting file size. Adjust one setting at a time so you can identify the tradeoff. Keep the original instead of repeatedly compressing an already degraded export.
Check size, text, and motion together
Compare the export with the original: does it meet the limit, can you still read captions, do gradients show obvious banding, and does the motion convey the intended action? To record a reduction, calculate “(1 − exported bytes ÷ original bytes) × 100%” and include dimensions and duration alongside the percentage.
Choose another output when the tradeoff is unacceptable
Do not keep lowering quality until the content becomes unreadable. Shorten the clip further, or try MP4 when the destination accepts video and the GIF format is not required. Compare the actual exports from the same source before claiming a size advantage.